
Setting up Accounting
Setting up Multi Touch Accounting is a multiple-step process. We strongly suggest you review everything listed in sufficient detail to understand the conceptual and practical impact of each decision involved during setup.
Multi Touch is available as a resource to complete parts or all of this process, to explain any unfamiliar concepts or to demonstrate the flow of particular transactions. You are strongly advised to reach out when you reach the limit of your own knowledge as complex warehouses, multi-currency and/or multi-company configuration can require more work to configure correctly.
The most important concept when migrating from other financial packages is that "Accounting starts in the Warehouse". Multi Touch uses a double-entry system for both warehouse operations and financial transactions. Receiving and delivering stock (assets) has a financial impact, so you should be sure to review how stock interim accounts are used to temporarily "park" AP from Vendor Receipts (Purchase Orders) and COGS from Delivery Orders (Sales Orders).
- Double-entry bookkeeping
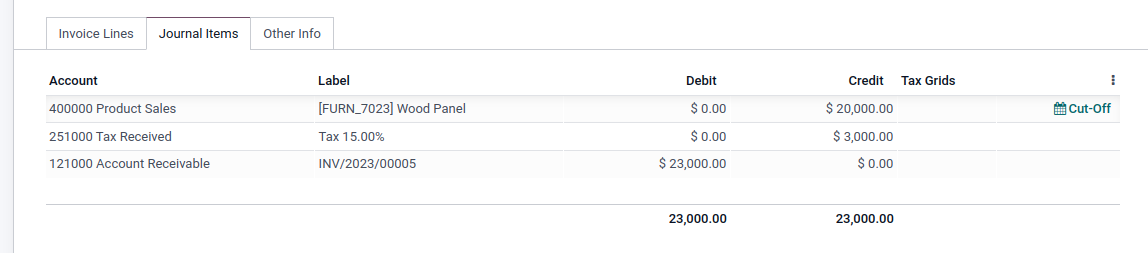
Multi Touch automatically creates all the underlying journal entries for all accounting transactions (e.g., customer invoices, vendor bills, point-of-sales orders, expenses, inventory valuations, etc.).
Multi Touch uses the double-entry bookkeeping system, whereby every entry needs a corresponding and opposite counterpart in a different account, with one account debited and the other credited. It ensures that all transactions are recorded accurately and consistently and that the accounts always balance.
- General Ledger
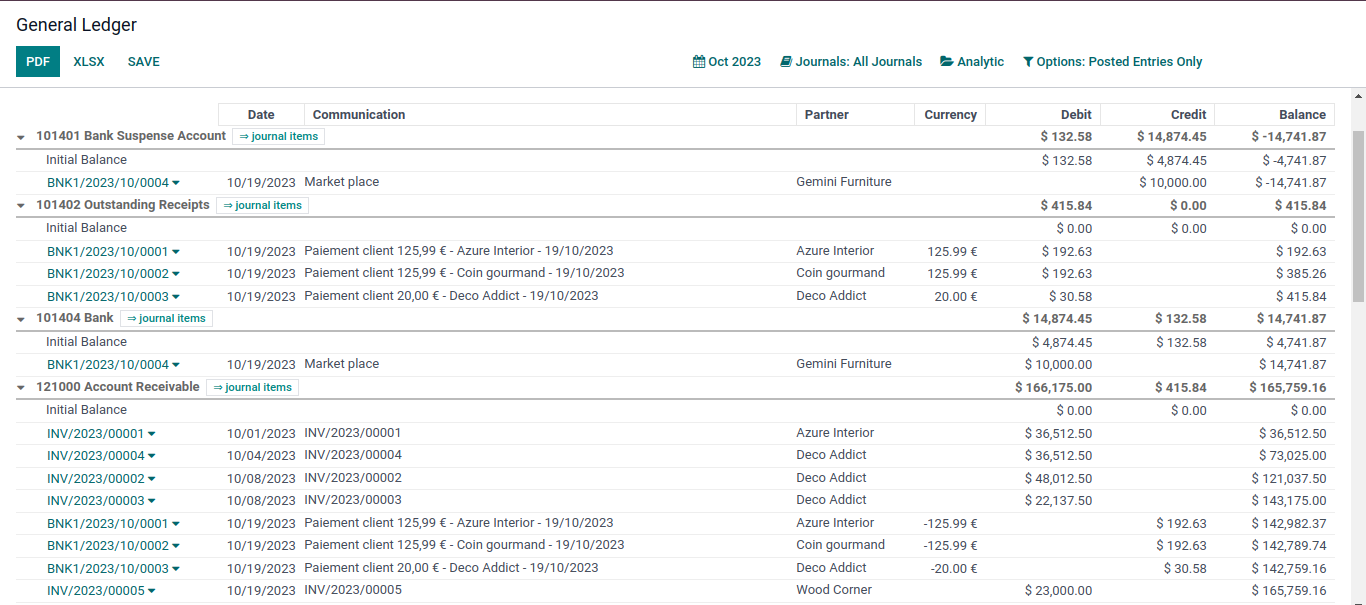
The General Ledger Report shows all transactions from all accounts for a chosen date range. The initial summary report shows the totals for each account and from there you can view a detailed transaction report or any exceptions. This report is useful for checking every transaction that occurred during a certain period of time.
Gather the following:
- Your company's legal name, tax ID, address, phone, email, and logo.
- Your chart of accounts.
- One bank statement for each bank account you hold.
- A list of your customer and supplier payment terms.
- A list of common taxes and their rates.
- Your Trial Balance (list of accounts and their balances).
- Your outstanding invoices, payments, and undeposited funds.
Note: for Multi-Company environments, you want this information for EACH Company.
Review the options on the Settings screen:
- Analytics

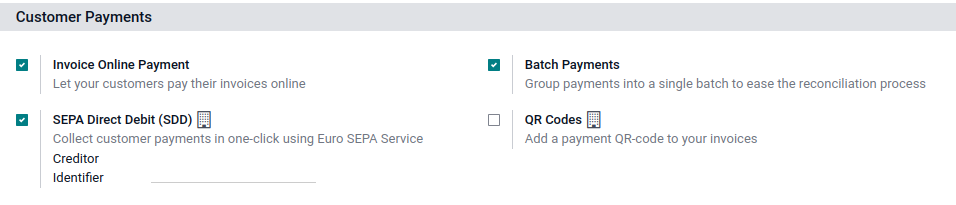
- Customer Payments
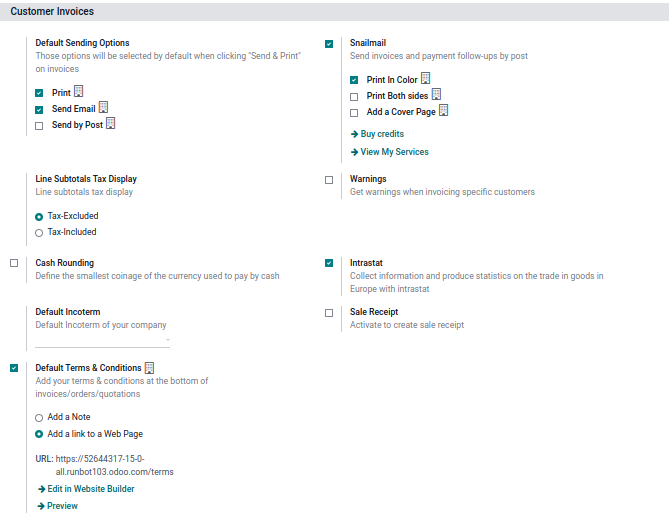
- Customer Invoices
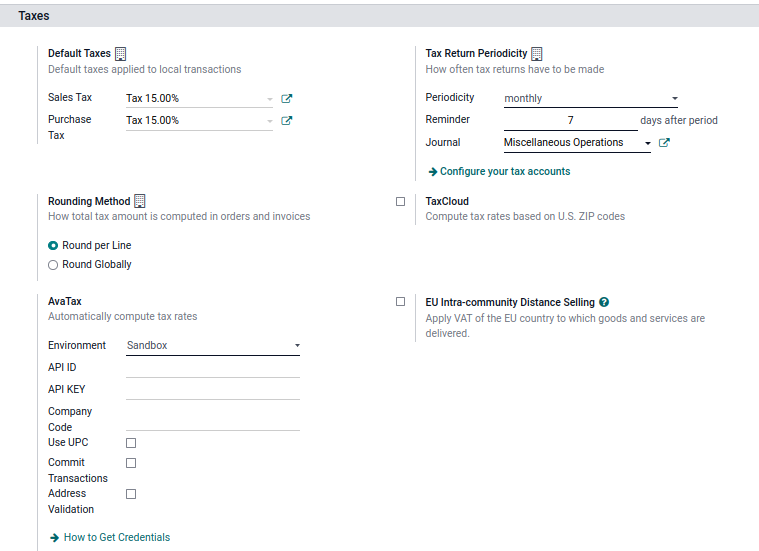
- Taxes
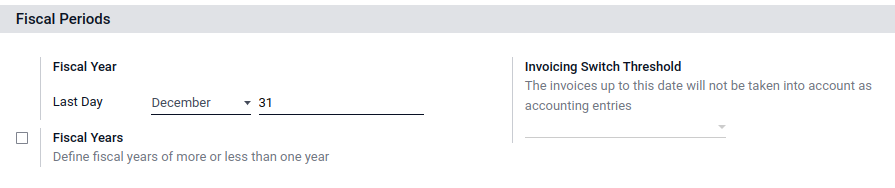
- Fiscal Periods
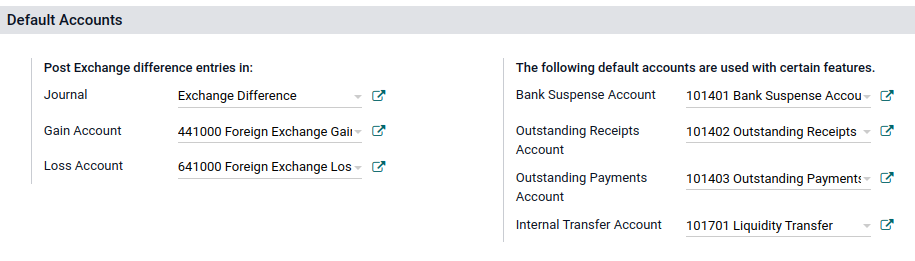
- Default Accounts
Setup your Company (or Companies)
- Make sure the name, tax ID, address, phone/email, and logo are correct.
- Make sure the currency is correct, and activate additional currencies (and exchange rate updates) if you plan to work in a multi-currency environment.
- Install the relevant chart of accounts (based on your country, or the configurable chart if we don’t have a localization).
- Modify the chart to match yours - do not change the types of any accounts listed in the Company Properties Menu, as these are linked to other records (like the default AR and AP accounts for Partners, the default Income and Expense accounts for Products).
- Do not create any custom account types (these have specific internal logic programed into them) - use Account Groupings if you want additional groupings on your profit and loss and/or balance sheet.
- Configure your document layout, invoice template, email templates and financial reports.
- Setup your Payment Terms.
- Create your Bank Accounts - either connecting to your bank website or verifying you can download statements.
- Define which accounts can be used to write Checks and modify your layout if needed.
- Setup your Purchase and Sales Taxes (or integration with TaxCloud as needed).
- Verify Fiscal Positions are set up and support your needs - potentially having a Tax Exempt position.
- Make sure a time zone is set up for each user you have created.
- Review Journals and set up any additional Journals and/or Journal Groups.
- Review sequences for documents - invoices, bills, credits, payments, journal entries, etc.
- Create/Import your Customers/Vendors and verify the correct AR and AP accounts are defined for them.
- Define your Inventory costing and valuation methods (if using the Inventory App) for your Product Categories.
- Define income, expense and cost of revenue accounts on your Product categories.
- Define inventory valuation (asset) accounts and interim (received/delivered not vouchered) accounts on Product categories and any production or scrap locations.
- Create/Import your Products.
- Assign taxes to your products (if needed).
- Enter your default Terms & Conditions.
- Import your Trial Balance via a Journal Entry, making sure to use a clearing/suspense account for AR, AP and Inventory.
- Make sure a product cost exists for every product you plan to import.
- Set the clearing/suspense account on the Inventory Adjustment location so your summary suspense balance is cleared when the adjustment completes.
- Import open AR and AP (be sure to include a reference allowing you to find the document when you need to apply payment and do not add a product to the Invoice or Bill line) using the suspense account as the counterpart so the summary balance is cleared when all Invoices and Bills are imported.
- Create/Import Assets and/or Asset models.
- Create/Import any ongoing deferred revenues or deferred expenses and/or models.
- Setup any Automatic Transfers you need.
- Install Payment Acquirers if you allow your Customers to pay online.
- Define any Bank Reconciliation Models you will need to suggest or partially automated bank reconciliation matching.
- Set a Bank Reconciliation threshold date to define when bank reconciliation will start.
- Review group assignments (permissions) to enable/disable access to financial information and/or functionality.
- Customize the follow-up report levels if you plant to send dunning report via email/mail/sms